How to Submit a Third-Party Engagement

Written by Michelle Henley
Updated at July 30th, 2025
Table of Contents
The Lextegrity Third-Party Management platform offers your organization an easy yet powerful and flexible solution to manage third-party risk by supporting due diligence activities. This includes giving users the capability to search the organization’s third-party population, submit a business rationale for engaging a third-party, request a due diligence questionnaire from the third-party, and/or route requests to appropriate Approvers for review and approval.
Note: The wording of tiles may vary depending on your organization’s specifications. The instructions below are meant as a general guideline only.
Navigating the System
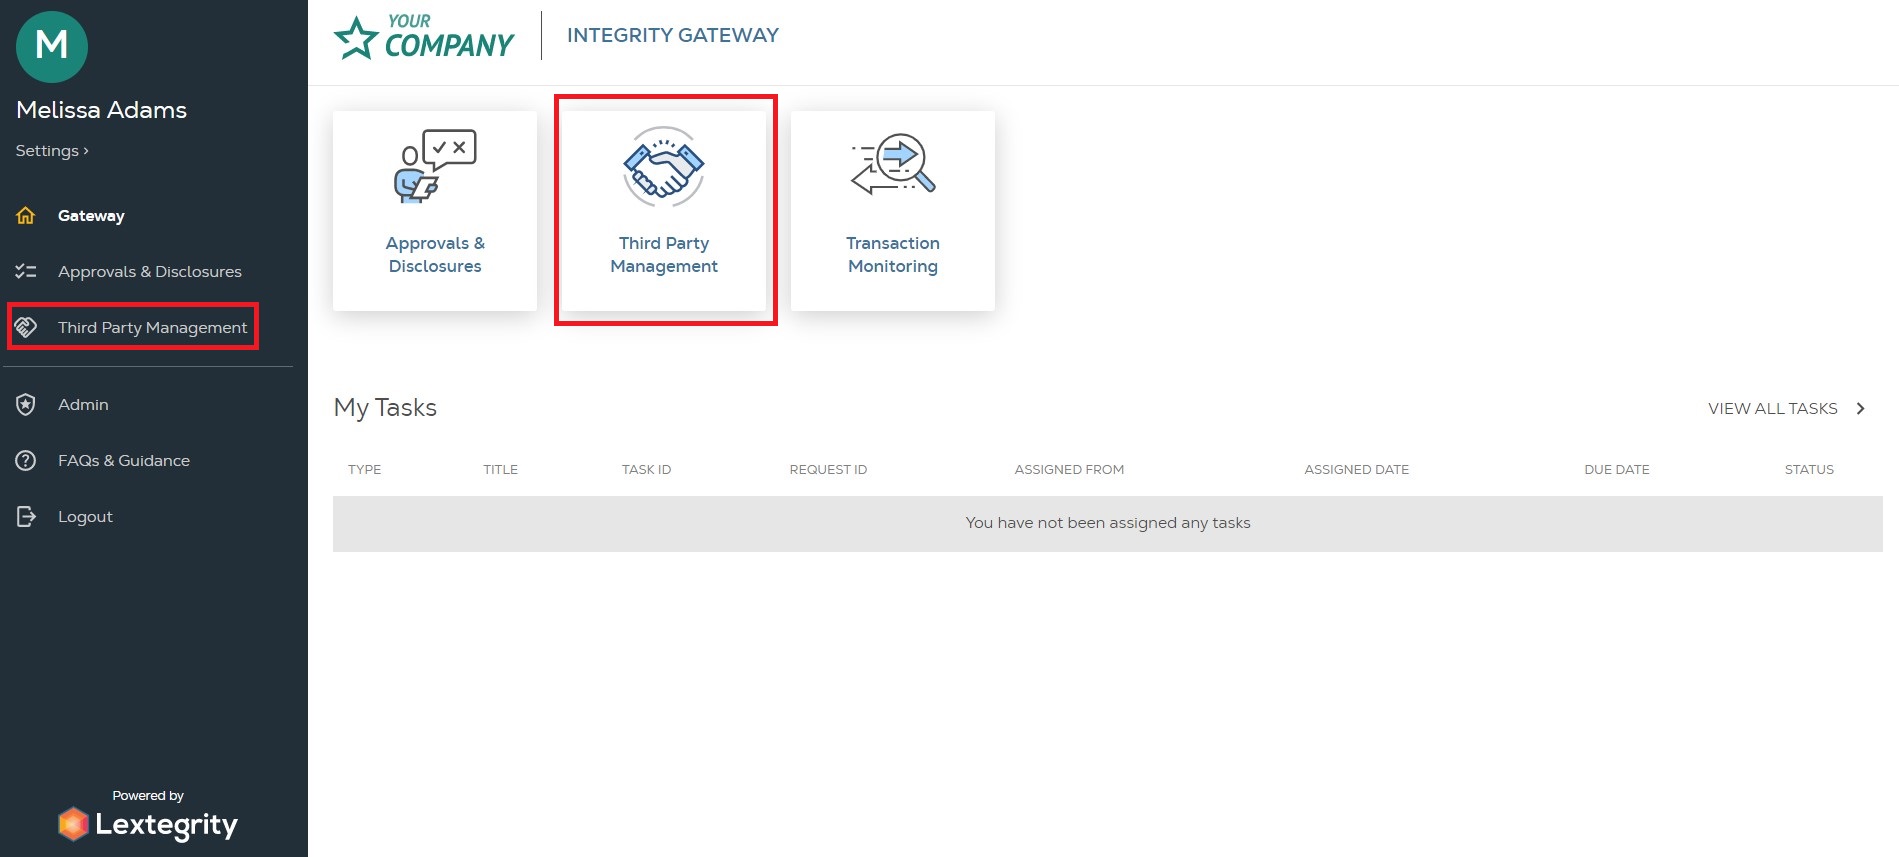
From the Gateway landing page, access Third-Party Management by selecting Third-Party Management from the left navigation menu or the corresponding tile on the right.
Starting the Request
The Manage Third Parties page will open. Users will have the option to start a request for a new party or an existing party. From here, users can create a new engagement using an existing party or create a new party. See below for instructions for each method.

• Using an Existing Third-Party
Use the Search Third Parties, Type, or Registration Country boxes to search for an existing party. If the correct party is returned in the search results, click Start next to the party's name to continue the request.
Any information previously saved in master data about the selected individual or organization will be prepopulated into the request.
Note: If the Third Party you are searching for is not returned, jump to the Creating a New Third Party instructions.

Alternatively, clicking on the Name of the Third-Party will take you to the Third-Party Profile Card.

Users can also start a new engagement from the Third-Party Profile Card by clicking the Create Engagement button in the top right corner.

• Creating a New Third Party
If the Third Party you want to engage with does not appear in your search results, or if you already know you need to create a new third party, click Create Engagement.

The Engage a Third Party page will open, so you can create a third party.

How to Create a New Party (Organization) within a Request
A new party refers to an organization that is created through the Add Party modal in the system.
It specifically applies to parties that do not already have a record within master data.
If the organization you are adding to the request is not populated in the dropdown list from the Name field, click Add Organization.

The Add Party modal will open.

"Email Address is Associated with Another Individual” Error Message
If a submitter is creating a new organization and receives an error message that says "This email address is already associated with another user," it means that email address is already assigned to an individual or organization in master data.

Two options exist:
- Return to the search screen and locate the existing party.
- A master data admin can update master data if the email is incorrect or assigned to the wrong profile.
After filling in any required (and any desired optional) fields, click Add Organization.

Now that the organization has been added, you can move forward with your request.
Note: The new organization will be added to master data at the time the request is submitted.
Updating an Organization (Before Submission)
Users can edit the organization before submitting a request by clicking the Pencil icon next to the Full Name field.

Updating an Organization (After Submission)
Warning: Once a request has been submitted for approval, the organization details cannot be modified within the request.
Any information that was previously entered into the New Party modal, such as Name, Address, Country, Address, etc., will need to be updated in master data by a master data admin.
Important: If master data is updated, the request must be canceled and recreated in order to reflect any changes. Or, if the organization itself is incorrect, the submitter must cancel the request and create a new one with the correct organization.
Users can still update the activity information within the request by following the directions found here:
Filling out the Business Rationale Questionnaire (BRQ)
The questionnaire is configured specifically to your organization’s needs and specifications. Many organizations opt to make a significant portion of the questionnaire mandatory to collect as much information about the request as possible.
Additionally, questions can be configured to be conditionally displayed based on the answers to previous questions. By making questions conditional, your organization can streamline the initial form and only present the user with the fields that will be required of them.
Submitters will not be able to proceed if the required information is missing. If the user leaves the required fields empty, the system will provide feedback, as pictured below.

The Business Rationale Questionnaire will collect information regarding the engagement and the Third-Party. This questionnaire is divided into various sections. These sections are displayed on the left-hand side of the questionnaire.
Users can navigate through the sections by clicking on the Name of the Section or clicking Next at the bottom of each questionnaire section.

If the section is incomplete, the navigation section will show a Red Exclamation Point next to the section link, indicating required information is missing.
If the section hasn't been started, it will be indicated with a Gray Circle.

• Request Detail Box
This information box provides details about the request:
- A unique, system-generated Request ID for reference
- The date the request was Created
- The Status of the request

• Information Icon
The information icon ⓘ is displayed next to some questions. Clicking this will open a pop-up window with additional information about the question. The window can be closed by clicking the X in the top right corner.

Submitting Your Request
Once a submitter has answered all of the required questions within each section of the questionnaire, they can click Submit Request, which is located in the Compliance Information section of the questionnaire.

If the submitter is not yet ready to submit their request, the request can also be saved or deleted by clicking the Black Icon containing three dots in the upper right-hand corner.

Additionally, if the submitter selects the Back button within the request, they will have the option to Exit without Saving, Continue Editing, or Save as a Draft.

Approver Information
Approvers are the person(s) who will review your request and either approve it, reject it, or ask you to update the information you provided.
After clicking the Submit Request button, the Approvers modal will open.
Note: Approver selection varies depending on your organization's specifications. You may be able to select the appropriate approver(s) from a drop-down menu, the approver(s) may be prepopulated for you (and not editable), or a combination of both.
Click here for more information on Changing Approvers in instances where it’s prepopulated.
Click the drop-down arrow on the right to select the appropriate approver(s). After selecting approver(s), the Confirm button will become available.
After adding an approver, the submitter can add optional comments, click Confirm, and submit their request.

By clicking Confirm in the Approvers modal, the system will:
- Submit the request for review.
- Send a notification email to your chosen approver or the first approver in your organization’s defined workflow.
- Change the request status to In Progress.
- Redirect the user to the Manage Third-Parties page, where the user will be able to see the request they submitted in the Recent Due Diligence Activity table under the Submissions tab.
Related Links
Search for a Request You've Submitted
Searching for Your Submission
From the Third-Party Management screen, Submitters can view all of their requests.
- Requests still in Draft status or not yet fully approved can be found under the Submissions tab.
- Fully approved requests can be found under the Approvals tab.

Each column can be sorted by clicking on the column title and sorting that column either up or down.

Requests can be viewed by clicking on the Request ID in the first column.

Third-Party Due Diligence Making Changes on a Request Post-Submission
Third-Party Due Diligence Making Changes on a Request Post - Submission
Third Party Due Diligence Requests Making Changes on a Request Post-Submission Af
Third Party Due Diligence Requests
Making Changes on a Request Post-Submission
After a request has been submitted, changes can still be made prior to full approval.
Click the links below for instructions depending on whether the changes you are trying to make are In Progress or in an Approved request.
Request Activity
| Updating the Request Activity | My request is In Progress | My request is Approved |
Canceling Request(s)
| Canceling Request(s) | My request is In Progress | My request is Approved |
Canceling DDQ
| Canceling a DDQ | My request is In Progress | My request is Approved |
Resending DDQ
| Resending a DDQ to a New Third-Party | My request is In Progress | My request is Approved |
Submitter/Approver
| Updating/Changing Submitter(s) | My request is In Progress | My request is Approved |
| Updating/Changing Approver(s) | My request is In Progress | My request is Approved |